
Building your own custom concrete swimming pool is an exciting project that allows you to create a unique and personalized oasis in your backyard. From the initial design stages to the final dive into the crystal-clear water, the process of building a custom concrete swimming pool requires careful planning, precise execution, and attention to detail. In this article, we will walk you through the steps involved in creating your dream swimming pool from start to finish.
1. Designing Your Dream Pool
Initial Consultation
- Schedule a consultation with a pool designer or contractor to discuss your ideas, budget, and timeline.
- Share your vision for the pool, including size, shape, depth, and any special features you want to include.
- The designer will survey your backyard to determine the best location and layout for the pool.
Custom Design Plans
- Based on your input and the site survey, the designer will create custom plans and 3D renderings of your dream pool.
- You will have the opportunity to review and make any revisions to the design before moving forward.
- The final design plans will include all details such as the pool shape, size, depth, materials, and any additional features like waterfalls, spas, or tanning ledges.
2. Obtaining Permits and Approvals
Permitting Process
- Before construction can begin, you will need to obtain the necessary permits from your local municipality.
- Your pool designer or contractor will handle the permit application process and ensure that all requirements are met.
- This may include submitting detailed plans, engineering drawings, and other documentation for approval.
Homeowner Association Approval
- If you live in a neighborhood with a homeowner association (HOA), you may need to submit your pool plans for approval.
- Check with your HOA for any specific guidelines or restrictions that may apply to pool construction.
- Your pool designer can make any necessary revisions to ensure compliance with HOA regulations.
3. Excavation and Construction
Excavation
- Once all permits and approvals are in place, the construction crew will begin the excavation process.
- The pool shape and size will be marked out, and heavy equipment will be used to dig the hole for the pool.
- The excavation process may take a few days to complete, depending on the size and complexity of the pool design.
Steel Reinforcement and Plumbing
- After the excavation is complete, the next step is to install steel reinforcement bars (rebar) to provide structural support for the concrete shell.
- Plumbing lines will also be installed during this phase to allow for proper water circulation and filtration.
- The placement of rebar and plumbing is critical to ensure the long-term durability and functionality of the pool.
Concrete Shell Construction
- Once the steel reinforcement and plumbing are in place, the concrete shell of the pool will be constructed.
- Shotcrete or gunite, a mixture of concrete and sand, will be sprayed onto the rebar framework to create a solid and watertight shell.
- The concrete shell will be allowed to cure and set before any finishing touches are applied.
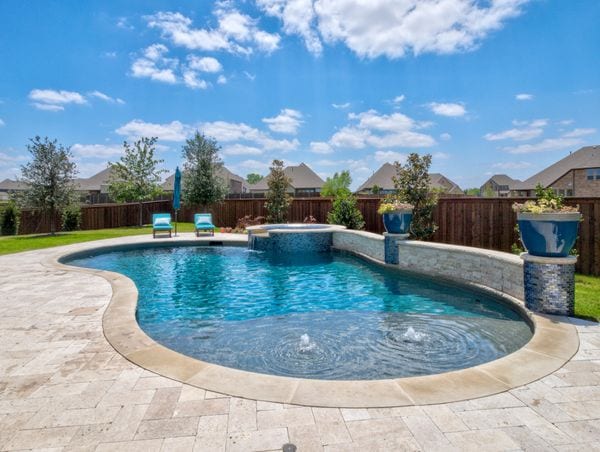
4. Finishing Touches and Landscaping
Tiling and Coping
- After the concrete shell has cured, the pool will be tiled with the material of your choice, such as ceramic, glass, or natural stone.
- Coping, the cap that covers the edge of the pool, will also be installed to provide a finished look and smooth transition between the pool and deck.
- You can choose from a variety of colors, patterns, and styles to complement your pool design.
Equipment Installation
- Once the pool structure is complete, the filtration system, pumps, and other equipment will be installed.
- Your pool contractor will ensure that all equipment is properly connected and functioning correctly before filling the pool with water.
- It is essential to have a well-functioning filtration system to maintain water quality and clarity.
Landscaping and Decking
- To complete the look of your custom pool, landscaping and decking will be installed around the pool area.
- You can choose from a variety of materials such as pavers, concrete, or natural stone for the pool deck.
- Plants, trees, and other landscaping elements will be added to enhance the beauty and tranquility of your outdoor space.
5. Pool Start-Up and Maintenance
Pool Start-Up
- Once the pool is filled with water, your pool contractor will start up the filtration system and balance the water chemistry.
- You will receive instructions on how to maintain the proper water balance and cleanliness of your pool.
- It is essential to regularly test the water and perform routine maintenance to ensure the longevity of your pool.
Professional Maintenance Services
- Consider hiring a professional pool maintenance service to handle regular cleaning, chemical treatment, and equipment maintenance.
- Professional technicians can help you troubleshoot any issues and keep your pool in pristine condition year-round.
- Regular maintenance is key to enjoying your custom concrete swimming pool for many years to come.
Building your own custom concrete swimming pool is a rewarding experience that allows you to create a unique and luxurious outdoor retreat. By following the steps outlined in this article, you can turn your dream pool design into a reality and enjoy endless hours of relaxation and entertainment in your backyard oasis.